Shipment event filters
Set up Shipment Event Filters and define which delivery events you want to capture, enabling real-time notifications and webhooks to keep you and your customers informed.
What is a shipment event filter?
Before enabling real-time notifications or webhooks in Track, you must first create a Shipment Event Filter. These filters “catch or filter” the exact delivery events (E.g. delays or delivery failures) that you want to identify in your Track system.
Shipment Event Filters are required to activate key Track features. Once set up, they allow you to:
- Send real-time notifications to customers through email or text (SMS).
- Trigger webhooks to external systems.
This ensures that Track responds only to the shipment events you’ve defined, giving you full control over which updates are triggered. As a result, your customers stay informed and their delivery expectations are managed more proactively by reducing WISMO.
Create a new shipment event filter
Go to Settings > Shipment event filters.
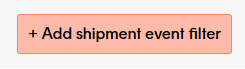
Select Add shipment event filter.
Type a suitable filter name.
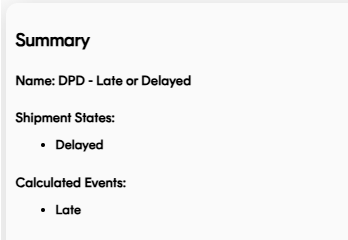
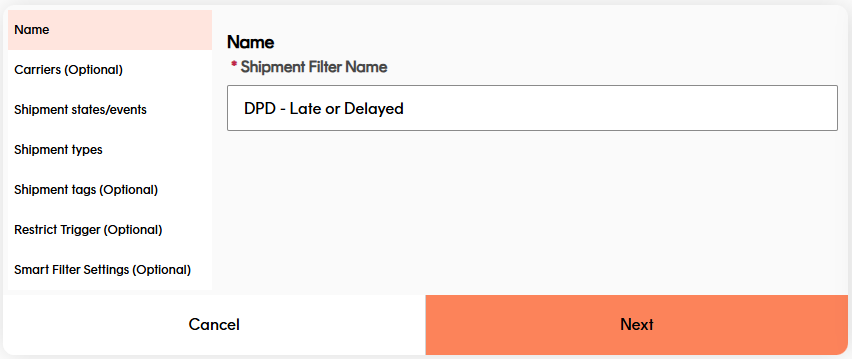 We recommend the filter name be related to the actual purpose of the event filter. For example, ‘DPD Late or Delayed’ would signify that the filter catches only Late or Delayed events on packages being delivered by DPD.
Click to select the carriers you want in the shipment event filter.
(Optional) You can click to Select all carriers.
If you do not select any carriers, the filter will trigger for shipments with all carriers.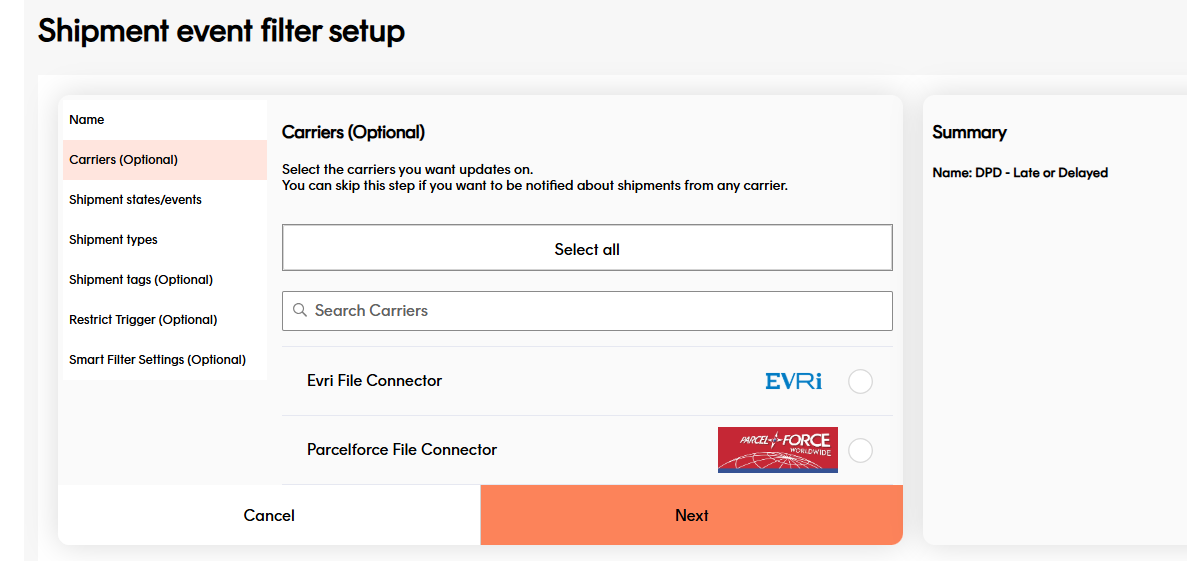
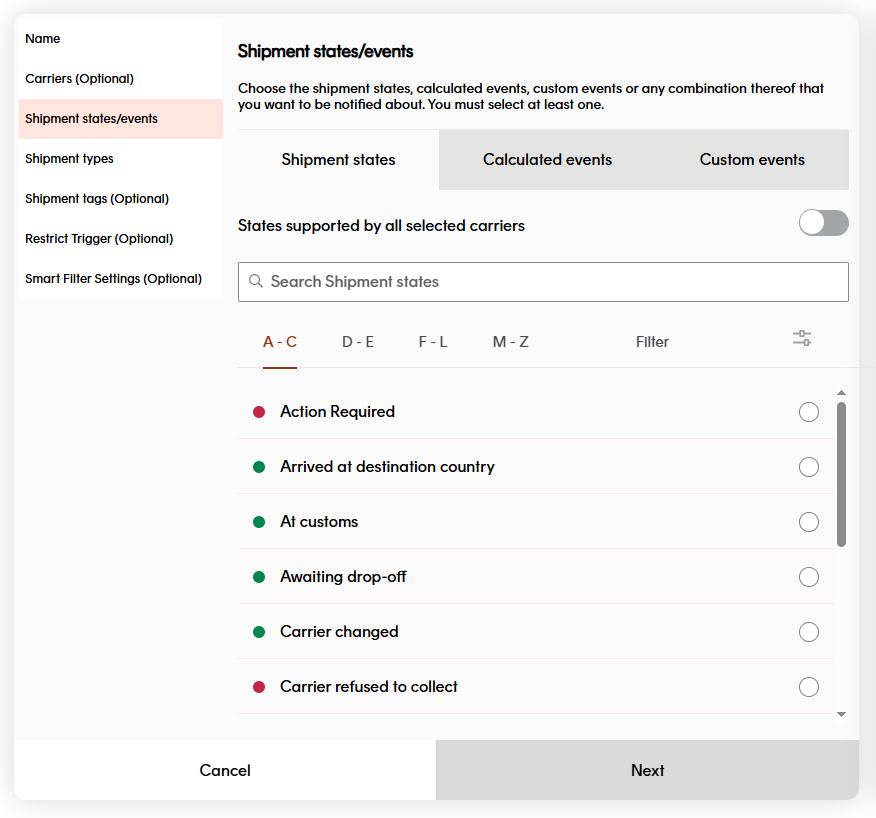
Click to select the Shipment tracking states, Calculated events, and/or Custom events you want in your Shipment event filter.
Note: At least one selection is required.
Click for more information, see our guides on
View your selections in the summary before moving forward.
Click the shipment types you want to include in your filter.
(Optional) You can click to Select all shipment types if you want.

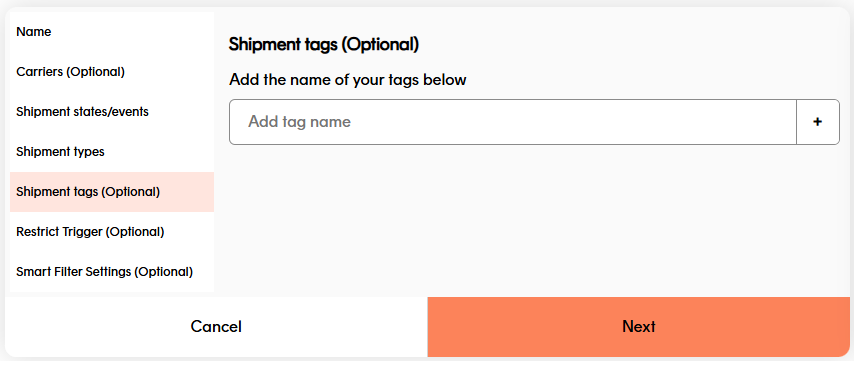
(Optional) Add any shipment tags you want by typing a name and clicking the plus button. If you add tags here, only the shipments that include your defined tag will trigger a webhook.
If you do not select any carriers, the filter will trigger for shipments with all carriers. Registering Shipmets API and Updating Shipments API.
(Optional) Set the expiry time of the shipment event filter if you have a corresponding smart filter set up.
This prevents customers from receiving outdated shipment notifications when too much time has passed since the original event.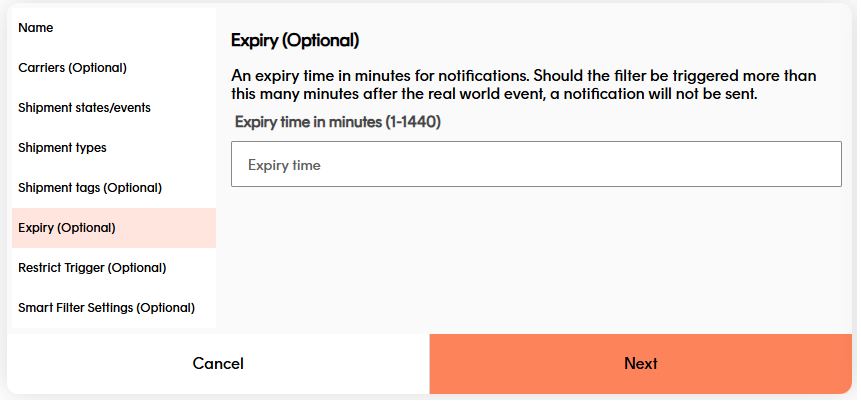
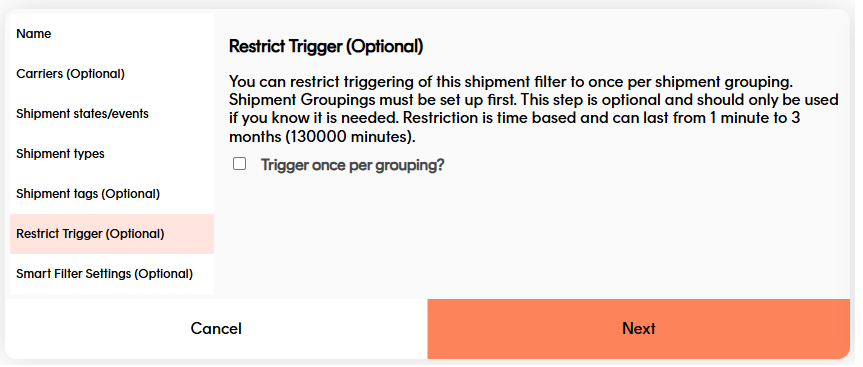
(Optional) You can click the tick box if you want to restrict triggering the shipment event filter to once per grouping. If you do not want this, just click Create Filter. For more information, see our article on shipment grouping.
Once you have clicked the tick-box, use the drop-down to choose the Grouping Metakey and type how long you want to restrict for (in minutes). When done, click Create Filter.
(Optional) For customers making use of Smart Filters, you can specify a smart filter window in your shipment event filter. Follow the steps below to configure smart filters in your event filter.
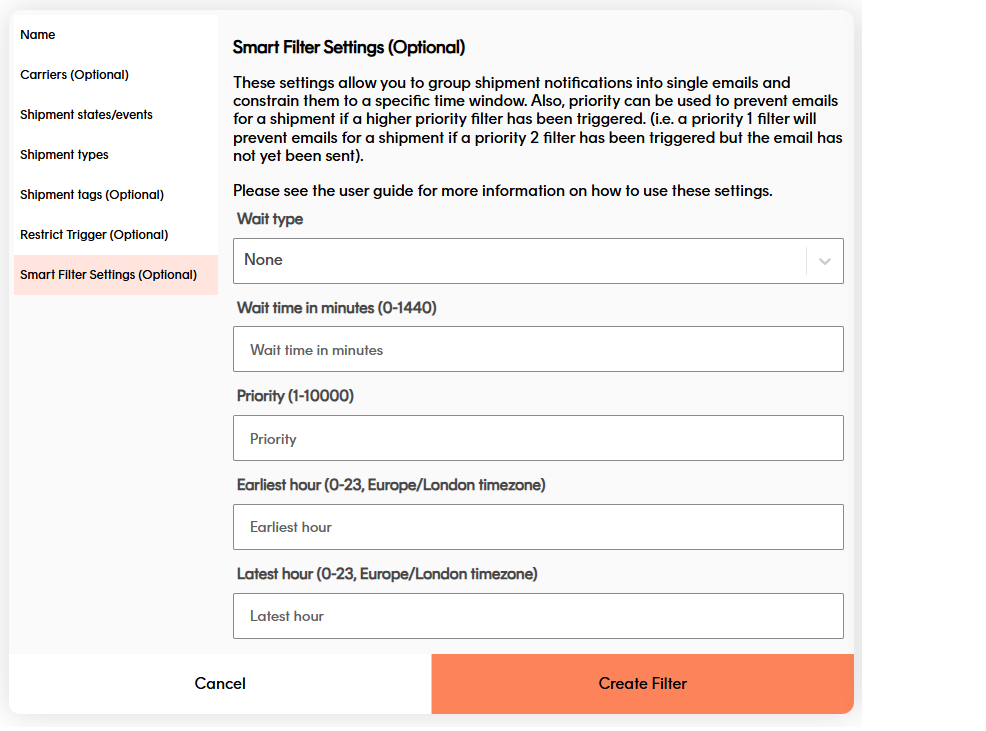
Wait Type - Determines how the system groups events before sending a notification.
None – Notifications are sent immediately once the filter is triggered.
Fixed – A fixed wait window begins as soon as the first event is triggered. Any further state events that occur during this window are included in the same notification. Once the window ends, the notification is sent.
EG: A 30-minute Fixed wait means all events within those 30 minutes are batched into one email.Rolling – The wait window resets each time a new event occurs. The system keeps extending the window until no new events arrive within the defined time, then sends the notification.
EG: A 30-minute Rolling wait means if another event happens at minute 25, the timer resets — delaying the notification and capturing the new event.
Wait time (in minutes) - Lets you specify how long (0–1440 minutes = up to 24 hours) the system should wait before sending the notification.
Useful for consolidating notifications when shipments in the same order may be processed minutes or hours apart.Priority - Determines which filter takes precedence if multiple filters are triggered at the same time. Lower numbers = higher priority.
EG: If a Priority 1 filter and a Priority 2 filter both match, the Priority 1 filter will send, and the Priority 2 filter is suppressed.
Earliest Hour / Latest Hour - Allows you to restrict notifications to certain hours of the day (based on the Europe/London timezone).
Well done! You have created a shipment event filter. If you are following this guide as part of setting up webhooks, click here to return to our webhooks guide. Otherwise, scroll down if you want to find out how to edit Shipment event filters.
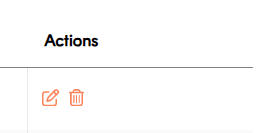
Edit or delete a filter
To edit an existing shipment event filter, click the Edit icon in the filter row. The process of editing an existing filter event is the same layout as how you would create one.
To delete an existing shipment event filter, click the Delete icon in the filter row. You cannot delete a shipment event filter if it is currently being used by one or more webhooks.
User access
Admin and Marketing users can view, edit and delete shipment event filters.
Dashboard users do not have access to this feature.
Next steps
View our product feature guides below: